Brief Overview of Ovulation Microscopes
An ovulation microscope, also known as fertility or ferning microscope, detects the formation of distinct patterns in the saliva, called ferns. Ferns can also be seen in cervical mucus. Although, the usage of saliva is much more common.
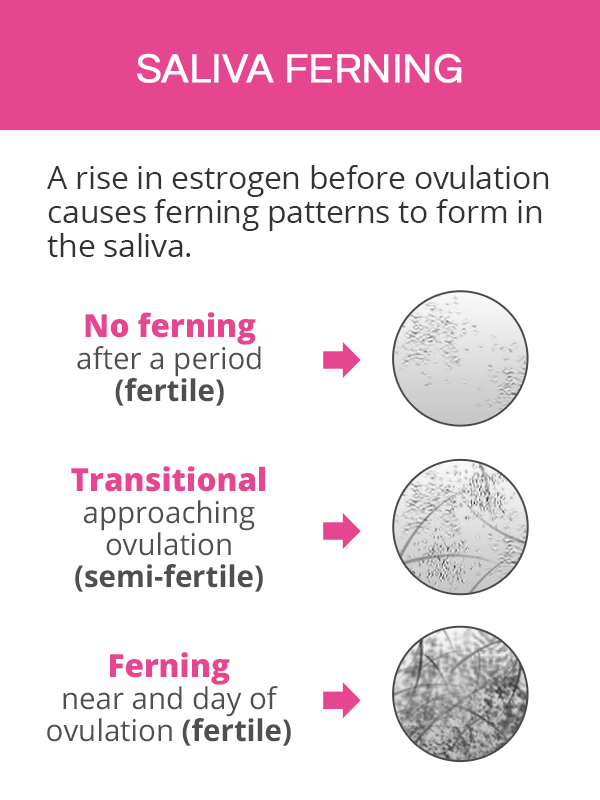
These crystalline patterns are created as a consequence of hormonal changes preceding ovulation. As estrogen levels are gradually rising following a period, the concentration of electrolytes in saliva is thrown off. This change in salivary salinity triggers microscopic fern-like patterns to form.
Depending on the phase of the cycle, testing with a fertility microscope can produce the following results:
Non-ferning phase. Following a period, there will be small dots or air bubbles present in the saliva. No ferns will be detected and conception is very unlikely.
Transitional phase. Closer to ovulation, there might be a mixture of dots and lines as well as occasional, mild ferns visible in the sample. Conception is possible, but not very likely.
Ferning phase. In the days leading up to ovulation and on the day of, there will be clear and pronounced fern-like shapes in the saliva sample. It indicates a woman's most fertile days.
A typical ferning microscope is in the shape of a small tube, resembling a lip stick tube. It is portable and can easily fit in a pocket or a purse. It contains a glass slide where the saliva sample is placed for observations. There is also an LED light to provide a better view of the sample as well as a rotating knob to adjust the resolution.
Also, the saliva ferning device is reusable. It can be purchased online or at local pharmacies at cost ranging from $20 to $40.
Using an Ovulation Microscope
Although diligent usage of an ovulation microscope can help a woman narrow down her fertile window, it is important to remember that its effectiveness can be affected by a number of factors, such as smoking or drinking.
When to Use an Ovulation Microscope
Measurements should be taken at the same time every day. A woman should refrain from eating or drinking at least two hours prior to testing her saliva.
A woman can choose one of two methods to decide when to start using an ovulation microscope:
Following a period. The easiest time to begin testing with a ferning microscope is immediately after a period. Once the bleeding stops, a woman should perform daily checks until ferning patterns appear in the saliva.
- 10th day of the cycle. Starting measurements ten days from the first day of a monthly bleed is another good way to use a ferning microscope.
Once ferns are detected, ovulation is likely to take place in the next 24 to 72 hours. Since sperm can live in the reproductive tract for up to five days, it is a good idea to plan intercourse shortly after detecting the ferns.
How to Use an Ovulation Microscope
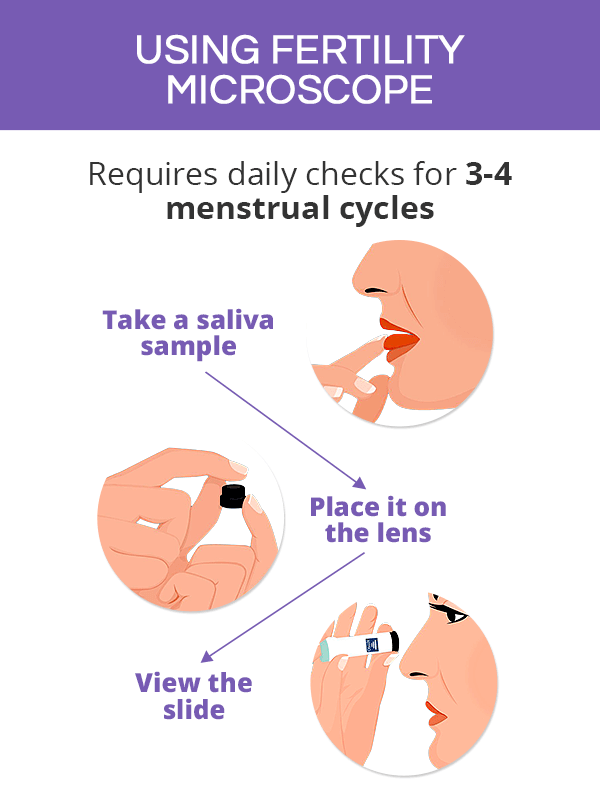
To take a saliva ovulation test, a woman can follow three simple steps:
Retrieving a sample of the saliva with a clean finger from the back of the tongue or underneath of it
Placing it on the glass slide of the ferning microscope and letting it dry for a few minutes
- Observing the patterns through the lens once the sample is completely dry
The resolution can be adjusted by gently rotating the eye piece of the fertility microscope.
Also, it is important to avoid air bubbles to ensure clarity of the image. If they appear in the saliva sample, the lens should be wiped off, and another sample should be used.
The lens should be properly cleaned and dried in between saliva ovulation tests.
Keeping a Saliva Ferning Chart
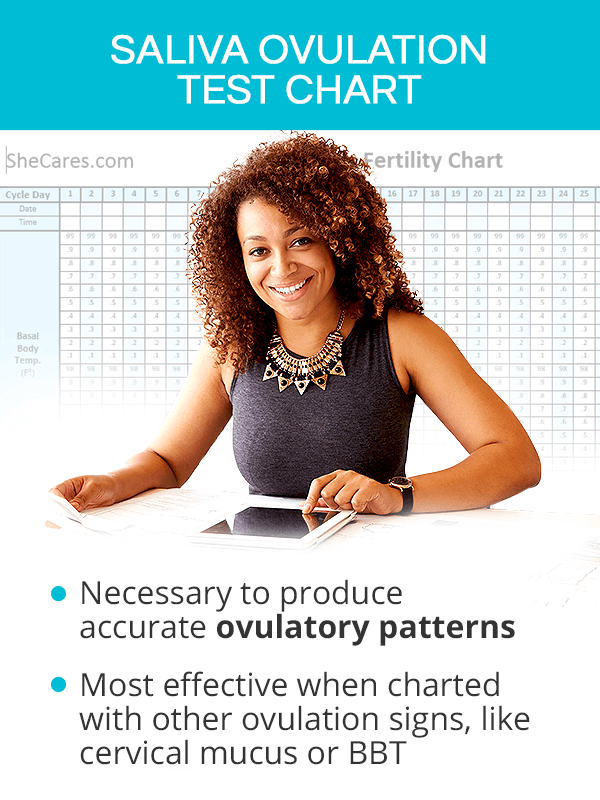
Tracking the appearance of saliva ferning in a chart is necessary for making accurate ovulation predictions.
Starting with the first day of the cycle, a woman can keep a record of the results of her daily saliva measurements. After three or four cycles, she should be able to notice a clear tendency of the ferns appearing around a specific time of the month, signaling her fertile days and ovulation occur in that window.
Common abbreviations for the measurements that can be used to chart the ferning patterns include:
- N = No ferning
- T = Transitional
- F = Ferning
For more reliable results, it is recommended to track saliva ferning with other ovulation signs and symptoms. They include measuring basal body temperature, checking cervical position or mucus, or noticing mild pelvic pain or breast tenderness.
A comprehensive fertility chart can be downloaded or made by hand. A number of ovulation trackers make it possible to store one's observations in a single application, which can produce ovulation predictions based on the input and alert a woman about her upcoming fertile window.


Conclusions
With devices, such as ovulation microscopes, preparing to have a baby is much easier than it used to be. These convenient, at-home tools can not only allow a woman to optimize her conception chances by helping her precisely estimate ovulation, but also help diagnose ovulation problems, such as irregular or absent ovulation, much faster. Equipped with knowledge about the functioning of her reproductive system, a woman is much more likely to succeed in getting pregnant naturally and with more ease.
Sources
- Annals of the New York Academy of Sciences. (2007). Patterns of Salivary Estradiol and Progesterone across the Menstrual Cycle. Retrieved September 13, 2018 from https://www.ncbi.nlm.nih.gov/pmc/articles/PMC2096416/
- European Journal of Obstetricians, Gynecology, and Reproductive Biology. (n.d.). Changes of salivary estrogen levels for detecting the fertile period. Retrieved September 13, 2018 from https://www.ncbi.nlm.nih.gov/pubmed/26319654
- Food & Drug Administration. (2018). Ovulation (Saliva Test). Retrieved September 13, 2018 from https://www.fda.gov/medicaldevices/productsandmedicalprocedures/invitrodiagnostics/homeusetests/ucm126061.htm
- Tenovuo, Jorma. (1989). Human Saliva: Clinical Chemistry and Microbiology. Boca Raton, Florida, USA: CRC Press Inc.